OK, it is actually the first model railroad weather project in about 27 years but you get the idea. I am dedicated to providing quality content for all my readers (OK, I don't have any readers but I will still post quality content).
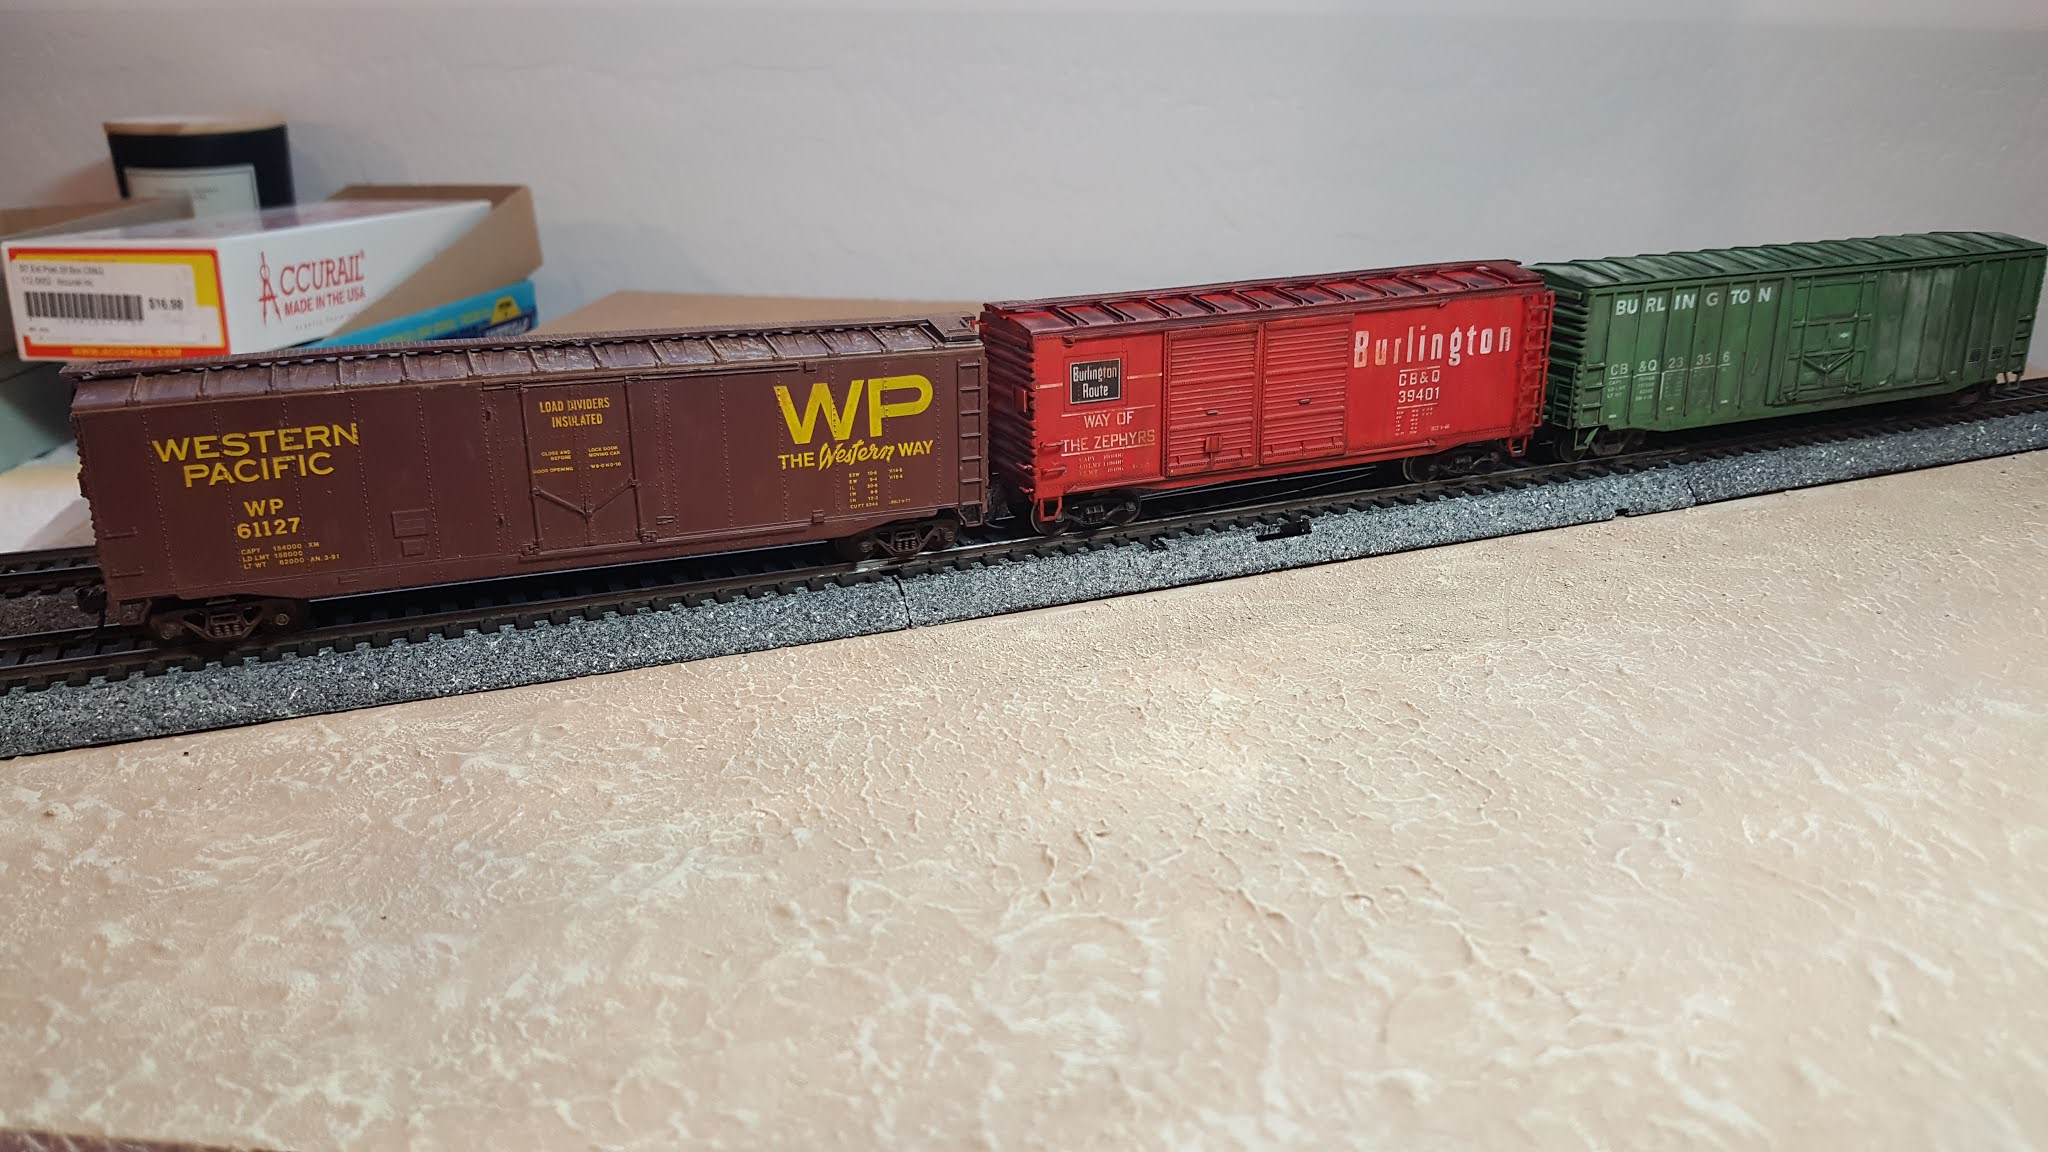
The subject of this project is a Burlington China Red Double Door PS-1 box car manufactured by C&BT Shops. This is an old kit, probably about 25 years old or more. I was not overly impressed with the details but I am sure it was considered a good kit at the time. Below are pictures of the assembled model.
 |
| The model came with metal wheels but they required assembly and don't roll very good. Replacing the wheels is not an option, you would need to replace the trucks as well. I will just stick with the originals. |
 |
| The ladders and other fine details are quite chunky and really out of scale. I was not a fan of this car after assembly. |
 |
| Roof detail is good but those ladders really stick out! |
Since this is really just a practice model, as are all of my 50-60s cars, I am not too concerned with how this turns out. I will be using materials and techniques that I have been using for a while as part of my war gaming hobby. I am pretty comfortable with these materials so this will be a good place to start.
 |
| Most of this is pretty common stuff. The Army Painter Strong Tone wash might be the most challenging to find but is readily available online. The isopropyl wash is the Lance Mindheim wash he outlines in his book. I used the weakest solution for this project. |
Below are the steps I followed with pictures. I kind of remembered to take pictures of all the steps.
 |
Start by removing the trucks. This allows easier access to the bottom of the car for painting. If you a better planner than I am you might do this during assembly.
|
 |
| Paint the bottom of the car, the wheels, and the trucks brown. I used Burnt Umber but just about any brown will do. The next step is to drybrush a medium orange color on the entire red portion of the car. This is to represent the fade of the red. You could also use something in the pink direction for the fade. |
 |
| After the orange drybrush you will have something like this. I went a little heavy on the roof but in retrospect I should not have bothered as the grey mostly covered this. The next step is to apply grey with a make-up sponge. This will be mostly just on the roof panels. |
 |
| The grey has been applied. You can see that almost none of the orange made it past this step. The goal is to make this look like the paint has fade almost completely off the top of the car. You could add some surface rust at this point. |
 |
| The final step is washes. This is really several steps all rolled into one and I did not get pictures of the process. I started off by covering the entire box car in strong tone wash. This is a dark brown acrylic wash. You might want to do a dull coat before applying washes as the water based washed might bead up and not provide even coverage on very smooth surfaces. Once the strong tone was nearly dry I applied the alcohol wash with a dropper. The alcohol will react with the acrylic paint in interesting ways. I sped up the drying by blowing on the model but I have added a hairdryer to my tools. The faster the drying the more of the fade and oxidation look you will get. Slow drying will result in the clumping of the pigments into interesting patterns. Experiment with this and you will get some interesting results. |
Below are the final results of my efforts. I am very pleased with how this car turned out. The weathering has helped me not notice the model's other issues. So much so that I really like this car now.
I have been having a lot of fun weathering cars and trying new techniques and products. I need to get some pastels and pigments and I really want to, finally, use my airbrush. Lots more to come.