Showing posts with label Painting. Show all posts

Wednesday, April 21, 2021

More Weathering Examples

 Work continues on my weathering experiments.  Here are some of my latest efforts.  This really takes some practice but even with very little experience you can get some nice results.

This car is the first where I made use of oil paints.  I only have Windsor & Newton Burnt Umber but there is a lot you can do with just this one color.  Before using the oil paint, however, I did some work using acrylic paints.  The rust spots are all done with acrylics and allowed to dry.  I then used the oil paint to do a wash.  Once that was allowed to cure, I went back and applied the rust streaking with the same oil paint. This has become one of my favorite techniques. It is VERY easy.  This car was finished with a dull coat.

These two covered hoppers were done in very similar fashion.  Both started with some stippling of rust colored acrylic paint. I used a very coarse packaging foam as the applicator as this had very wide bubbles to give a good texture.  The UP car got much more of the stippling, and an additional color, than the Rock car got.  After the stippling they both got acrylic washes of very thinned acrylic paint.  The UP car got a more brown wash an the Rock car got grey.  For the final details I did the oil rust streaking on the UP car and the Rock car got some thicker grey acrylic spill marks.  Both these cars were finished with a dull coat.


This hopper got almost the exact same treatment as the box car above.  I always use acrylic paint on the wheels and trucks but I do vary the colors from car to car.  This car was finished with a dull coat.  This is an important step when using the oil paints but you need to wait several days to ensure the paint thoroughly dries.

This car has a lot of techniques going on.  The first step was a thorough dry-brush of light blue over the entire body.  This is particularly important on the roof to give a nice faded look.  Next is stippling of rust colored acrylic paint with a focus, again, on the roof.  Next are some rust scrapes and spots with different rust colored acylics.  The car then got an acrylic wash followed by and alcohol wash.  Each of these washes were dried with the aid of a blow-dryer.  Finally oil based rust streaks were added.  This car did not get a dull coat.


This car is an extreme example of what you can do with mostly alcohol and ink. I started with a dry-brush of an appropriate reddish color to lighten things up.  I then used my Lance Mindhiem India in and alcohol wash. With is applied with a dropper and then allowed to run over the model. It is then QUICKLY dried with a blow-dryer.  As the alcohol dries it will produce this extremely faded effect.  You could leave it just this way but I went back and added an acrylic wash of a light brown over the top.  DO NOT varnish or dull coat this as the effect of the fade will be ruined.

This car was painted like the Santa Fe car above but I added in more acrylic rust work and some rust streaking.  I then dull coated it and the alcohol fade was basically removed.  Fortunately it still looks good so no need for re-work on this one.


I am really starting to fall into a groove with my weathering so it is time to change things up.  I need to add more oil colors to the line-up and I still need to try some pastels and pigments.  I have seen some interesting results on YouTube of using some rattle can spray paint to produce some airbrush-like effects.  So much more to try!

Tuesday, April 6, 2021

First Weathering Project

 OK, it is actually the first model railroad weather project in about 27 years but you get the idea.  I am dedicated to providing quality content for all my readers (OK, I don't have any readers but I will still post quality content).

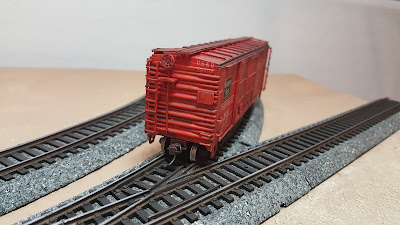
The subject of this project is a Burlington China Red Double Door PS-1 box car manufactured by C&BT Shops.  This is an old kit, probably about 25 years old or more.  I was not overly impressed with the details but I am sure it was considered a good kit at the time.  Below are pictures of the assembled model.

The model came with metal wheels but they required assembly and don't roll very good.  Replacing the wheels is not an option, you would need to replace the trucks as well.  I will just stick with the originals.

The ladders and other fine details are quite chunky and really out of scale.  I was not a fan of this car after assembly.

Roof detail is good but those ladders really stick out!

Since this is really just a practice model, as are all of my 50-60s cars, I am not too concerned with how this turns out.  I will be using materials and techniques that I have been using for a while as part of my war gaming hobby.  I am pretty comfortable with these materials so this will be a good place to start.

Most of this is pretty common stuff.  The Army Painter Strong Tone wash might be the most challenging to find but is readily available online.  The isopropyl wash is the Lance Mindheim wash he outlines in his book.  I used the weakest solution for this project.

Below are the steps I followed with pictures.  I kind of remembered to take pictures of all the steps.

Start by removing the trucks.  This allows easier access to the bottom of the car for painting.  If you a better planner than I am you might do this during assembly.

Paint the bottom of the car, the wheels, and the trucks brown.  I used Burnt Umber but just about any brown will do.  The next step is to drybrush a medium orange color on the entire red portion of the car.  This is to represent the fade of the red.  You could also use something in the pink direction for the fade.

After the orange drybrush you will have something like this.  I went a little heavy on the roof but in retrospect I should not have bothered as the grey mostly covered this.  The next step is to apply grey with a make-up sponge.  This will be mostly just on the roof panels.

The grey has been applied.  You can see that almost none of the orange made it past this step.  The goal is to make this look like the paint has fade almost completely off the top of the car.  You could add some surface rust at this point.

The final step is washes.  This is really several steps all rolled into one and I did not get pictures of the process.  I started off by covering the entire box car in strong tone wash.  This is a dark brown acrylic wash.  You might want to do a dull coat before applying washes as the water based washed might bead up and not provide even coverage on very smooth surfaces.  Once the strong tone was nearly dry I applied the alcohol wash with a dropper.  The alcohol will react with the acrylic paint in interesting ways.  I sped up the drying by blowing on the model but I have added a hairdryer to my tools.  The faster the drying the more of the fade and oxidation look you will get.  Slow drying will result in the clumping of the pigments into interesting patterns.  Experiment with this and you will get some interesting results.

Below are the final results of my efforts.  I am very pleased with how this car turned out.  The weathering has helped me not notice the model's other issues.  So much so that I really like this car now.


I have been having a lot of fun weathering cars and trying new techniques and products.  I need to get some pastels and pigments and I really want to, finally, use my airbrush.  Lots more to come.

Wednesday, March 3, 2021

Bachmann EZ Track Upgrade How-To - Turnouts

The next step in the track upgrade project are the turnouts.  These are a bit more complicated than the straight and curve pieces and deserve careful consideration.  I am working with the standard trainset turnout.  These don't have a number like other turnouts as they are designed to replace either a 9" straight or an 18 degree curve.


This is the turnout I am upgrading.  It is a left-hand remote turnout with steel track and black roadbed. 
 
There is lots of stuff on the bottom.  The wire connected to the switch actuator and next to that is a cover held on by some screws.


 Before we can get to painting we have got to figure out how to get the track off the roadbed.  This is different from the straight pieces in several ways.  The obvious difference is the motor and the linkage that operates the turnout.  Another difference is the turnouts are not glued down but have screws to hold them in place.  We will start by removing the linkage.

Remove the six screws that cover the linkage.  Take moment to study this before removing any parts.  It is a good idea to take a picture at this point to make reassembly easier.


The parts are easy to remove.  Remove the connecting rod first. It just lifts off the gear and slide out of the tab from the track.  Remove the gear next.  Keep all these parts in a safe place. You could remove the actuator is you want to.  I left mine on but it does complicate things a little.   
 

Once you have removed all the gizmos its time to flip it over and remove the track.

See that tiny little screw?  It is very small.  It is a Phillip's head but I used a very small flat head to get it out. The hardest part is finding the right size screwdriver.

Two more towards the center.  See them?  There is a fourth screw at the other end.  No picture but you get the idea.

We are now ready to prep these parts for paint!

Once you have disassembled the track you can prep the parts for painting pretty much the same way as for the straight pieces. You can review the previous post for materials and such.

Here are the painted parts with the painters tape still in place.  The track is a little fiddly to get the tape on all the rails but it is worth the time to get a good coverage.


I taped off the area on the roadbed where the trunout slider rests.  I wanted to make sure this had good movement once reassembled.


I taped off this area above the actuator.  Seems to be some sort of ground or contact that seemed like it shouldn't get painted.


I spent a lot of time taping off this notch but in retrospect I should have just painted it.  It stands out a too much now.


Make sure that when you hand paint the rail sides you leave the contact pints unpainted.  If you don't you will have to go back and clean things off to get a good electrical connection.

Paint the rail sides just like you did for the straight pieces.  Don't get paint on the ends of the rails where the joiners connect.

Turnout is reassembled and needs just a little bit more detail work to be ready.  The next one I do I will tape off the bottom of the roadbed around the switch mechanism and the wires.  I got a surprising amount of over-spray.  It didn't hurt anything but I could have caused some issues.

I was really intimidated thinking about how to do the turnout but they are actually no big deal.  Keep track of the parts and document how it all went together and you should have no issues.  Not sure what I will try next. The power re-railer is probably the most interesting thing left to try.

Friday, February 26, 2021

Bachmann EZ Track Upgrade How-to

 In my previous post I promised to show you how I did the upgrades to my EZ track.  For this project I am working with the steel track in black plastic.  This will work exactly the same with the nickel-silver track in grey.

To start with you need some EZ track.  You could also apply this technique with some of the other track and roadbed products out there but I've not tried any of those.


You will need to remove the track from the plastic roadbed.  I have mostly the older style of EX track which is just glued to the roadbed.  For this you gently pry the track off the roadbed.  I found this to be easier when you start in the middle of the track rather than then ends as there seems to be less glue in the middle.  The newer EZ track has some tabs on the bottom of the track to help hold it in place.  These should come apart in the same way.

For this project you will need some sort of dark brown spray-paint.  I like the Krylon camo dark brown.  This is nice and flat.  Next you need some type of stone effects paint.  For this I used Rustoleum American Accents.  This is a grey speckle paint. You need some painter's tape and maybe some mineral spirits for cleaning rails (I actually did not need this as I taped the rails).  Not pictured is some acrylic burnt umber paint and super glue.

Once you have separated the track and the roadbed you need to tape off the ends of the roadbed.  You want to make sure that the tabs and flat surfaces don't get any of the texture paint on them or the track sections will not go back together.


When you spray the stone effects paint it will go on blotchy and that is OK.  Do light coats and focus mostly on the sides of the roadbed.  I found it took 2 coats with a couple hours drying time between coats to get the best results.  I let the section dry over night before removing the tape.  Once fully dry the paint feels a little flakey so I gave it a coat of dull coat to help seal it.  
While waiting on the roadbe d to dry you can prep the track sections.  You could just paint these sections as is and is a rag and some mineral spirits to clean the tops of the rails before the paint dries.  Where I live paint dries FAST so I opted for taping the rails. Cut your painter's tape in thin strips and apply to the top of the rails. Fold the edges of the tape down and press tightly to the sides of the rails.  This is not too important as you will paint the side by hand later on. Make sure to wrap the tape around the ends of the rails as this is where the electrical contacts are.  


The painted track with the tape removed will look something like this.  I did not apply any dull coat to the track sections but you could before you remove the tape.  If you are using another brand of track you might skip this step if the plastic is already brown.


After everything has dried glue the track section back to the roadbed.  I used regular super glue and just put a drop on the ends of the ties and one in the middle of the ties.  You don't need to glue at each tie but I did most of them (maybe 3/4).  At this point you could call this done and it would look so much better but I did a little bit more.


This was the first project I used my Lance Mindheim India ink washes.  I used the #2 as it is the darkest.  TO be honest, it did not work too well so I used a combination of watered down acrylic black paint and the wash.  I did the acrylic first and then once it was mostly dry I dropped on the wash.  That worked pretty well.


Just do the wash on the top of the roadbed and mostly between the rails.  This just adds a realistic grime to the track.  If you wanted to do a wash on the sides use the color that is closest to your ground color to tie things in.  Don't for get to paint the sides of your rails with the Burnt Umber paint.

This is all there is to it.  I used some sandpaper to clean the tops of the rails and then rolled them by rubbing a metal washer over the rail tops to polish them.  This technique works for straight sections and curved sections in any size.  For the grey roadbed I would black prime the roadbed first and then do the texture paint.  This will keep the look consistent. The nice thing about this technique is that it improves the look of the track without the more permanent ballasting options.  You can still take this apart easily and reconfigure as needed while preserving the look.

Wednesday, February 24, 2021

Upgrading the Appearance of Bachmann E-Z Track

 When I made the decision to jump back into the model railroad hobby I was very interested in the various track and plastic roadbed products. The most common, and probably the most accessible, is the Bachmann EZ track system.  All of these types of track are pretty cool and seem to be a great place to start for new hobbyists.  As neat as they are they do have some drawbacks.

I have, over the last couple of months, purchased a pretty large collection of EZ track.  Most of it is the steel track with the black plastic roadbed.  Visually this stuff is pretty boring stuff. 

Plain black plastic track and roadbed is pretty boring and lacks much detail.

The roadbed does have a little texture but not much.

Looks a whole lot like a toy train which is really how it is marketed.

Sad

I spend many hours digging through YouTube videos looking for cool ideas on how to upgrade the appearance of the track. To be honest there is not really much useful information and much of what is there is how-to's on ballasting the track. Most of the ballasted EZ track I've seen is not really much of a visual upgrade.  But then I found John's Trains on YouTube.  He has a really nice HO layout but he was gifted a Bachmann starter set that includes EZ track.  We wanted to use the entire set but, like me, did not like to the look of the track.  He documented how he upgraded the track and the results are really great! I adapted his approach and here is the results I got.

This looks a lot better!  It actually looks like ballast.

Painted track and ties look very authentic.  I did some washes down the center of the track but you can't really see this in these pictures.

This looks more like a model and less like a toy but it still has its flexibility and portability.  It is still EZ track.

In my next post I will show you how I did this and the materials required.  I am also working on a post for EZ track turnouts, which are little more challenging to do.  Finally I will do a little diorama showing the final results and how this might look on a layout.  I hope this technique will make EZ track more of a viable basis for a 'serious' model railroad.

2023 Year in Review and Looking Ahead to 2024

  The New Year brings and opportunity to look back on the old year and reflect on how things have gone, and perhaps, learn some lessons that...